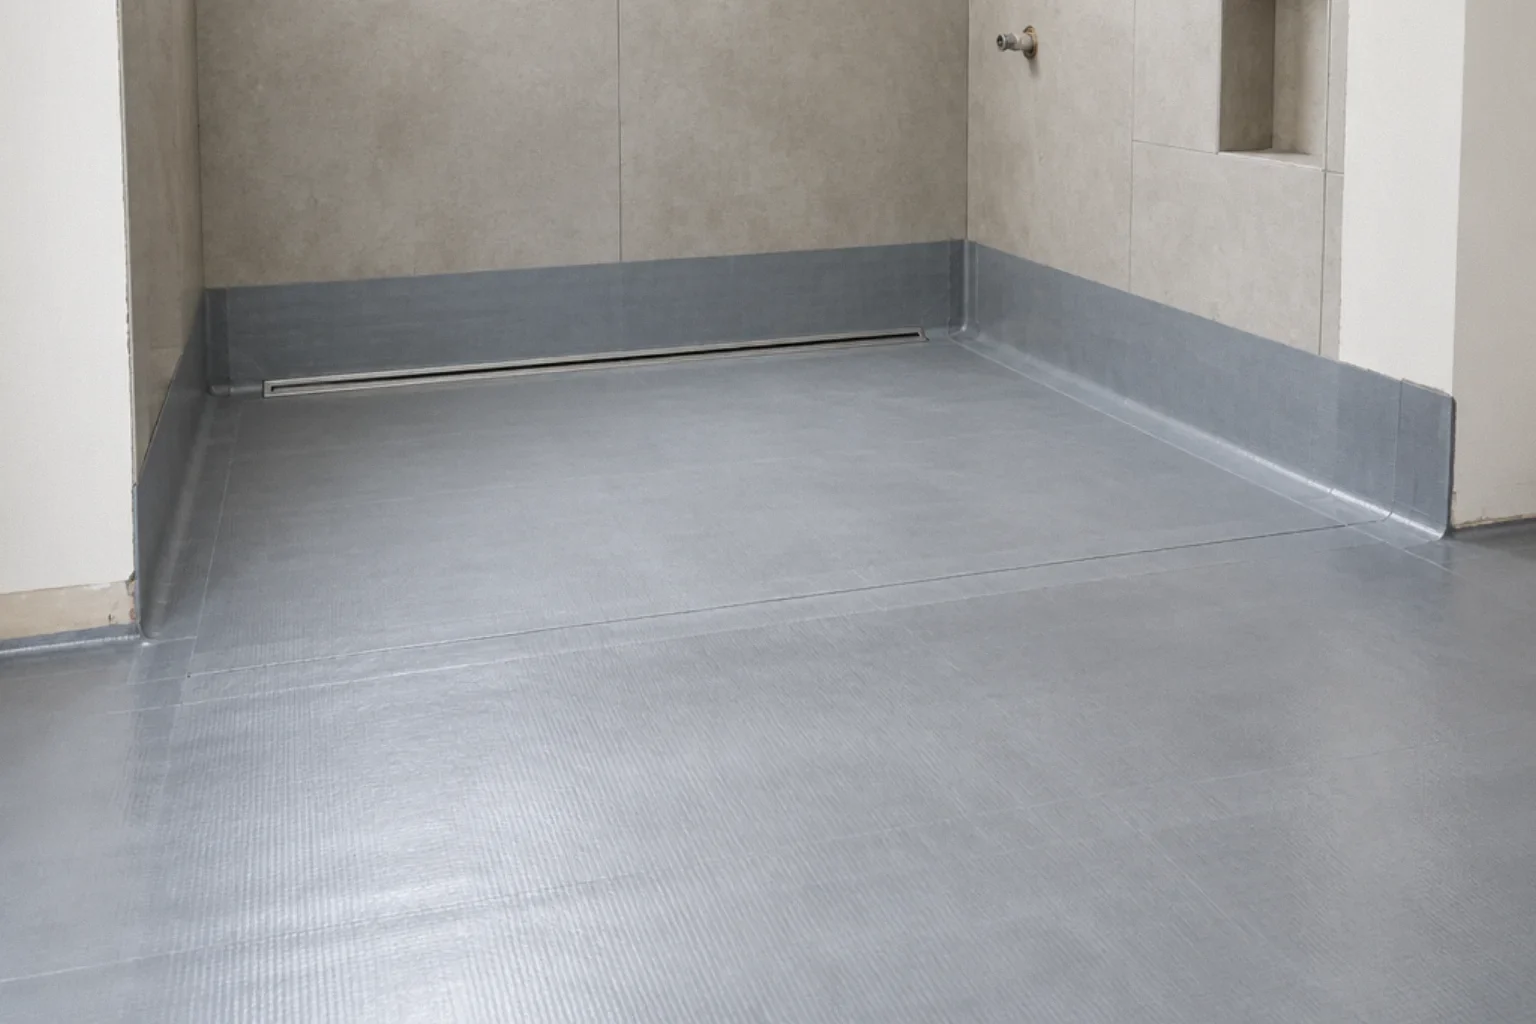
Short answer: water escaping a curbless shower can result from its layout, slope, spray containment, drainage or defective waterproofing and plumbing. These need to be assessed together. A curbless shower still needs a sloped floor to the drain. Without a curb to contain water, that slope has to start at or below the level of the bathroom floor, so the shower area is usually recessed into the floor structure, or the whole bathroom floor is raised. Waterproofing should extend beyond the shower footprint, and drain type and placement have to match the slope plan. When those are designed together, curbless showers work well and are easier to enter. When a contractor simply omits the curb from a conventional design, problems follow.
This article is general information verified on 3 October 2026. It describes manufacturer guidance and design questions, not an engineering assessment of your floor.
What owners worry about
In a thread showing an open bathroom with shower jets and no obvious barrier, one commenter immediately asked whether water reaches the tub or the rest of the room (bathroom remodel discussion). A family adapting a home for wheelchair use discussed converting an existing large shower to a flat roll-in (How would you reconfigure this?, outside California). And in a bathroom regrets thread, one commenter suggested a floor drain in a large bathroom so water can be swept away during cleaning (What regrets on renovation do you have?). Forum accounts are anecdotal; they capture the two big concerns: containing water and getting the floor heights right.
The core design problem: height
A shower floor needs slope to the drain, and the waterproofing and tile assembly have thickness. In a conventional shower, the curb provides the extra height. Without one, Schluter's guidance on curbless systems describes three ways to solve it: recess the subfloor in the shower area so the sloped assembly fits while the bathroom floor height stays the same; use a prefabricated tray with ramps; or raise the surrounding bathroom floor to meet the shower (Schluter: curbless shower systems).
| Approach | Good fit when | Watch for |
|---|---|---|
| Recess the shower subfloor | Wood-framed floor with accessible framing below or a design that works between joists | Joists, pipes, ducts and wiring under the shower; structural rules on altering joists |
| Raise the bathroom floor | Whole-room remodel; recessing not feasible | Step or transition at the bathroom door; door and toilet heights |
| Tray or ramp system | Limited structural changes possible | A small ramp may remain; check whether it suits wheelchair users |
| Slab floor: lower the concrete | Slab-on-grade houses where height cannot be added | Engineered slab alteration; locate drain lines, radiant tubing, reinforcement and any post-tensioning before considering cuts |
Joists and structure
Recessing a wood floor often means working around or with the joists. Schluter markets a floor recessing bracket system that, it says, supports recessed subfloor panels between joists without cutting or modifying structural members, for joists spaced up to a stated limit. Other approaches involve sistering, lowering or reframing joists, which is structural work. Pleasanton's current kitchen handout includes a general note that cutting, notching and drilling floor members must comply with California Residential Code section R502.8 (Pleasanton JLA 01.26); the same principle applies under a bathroom. If a design changes joists, ask whether an engineer needs to review it and whether your building department will require details on the permit drawings.
Water containment without a curb
- Extend the waterproofing. Schluter recommends waterproofing at least 1 foot beyond the shower area in curbless showers, because there is no curb to define the wet zone, and advises protecting the bathroom against water generally. Some designers waterproof the entire bathroom floor.
- Slope the right way. The shower floor slopes to the drain; the area just outside must not slope back toward the door. Ask for a drawing showing slope directions and high points.
- Choose a drain that fits the slope. A suitably located and sized linear drain can allow the floor to slope on a single plane, which suits large tiles and can sit at the entry or the back wall. A center point drain requires slope from all sides. Each drain system has its own installation instructions; follow the one installed.
- Think about spray direction. Put the showerhead so it sprays away from the open side. A fixed glass panel can control splash while keeping the entry open.
- Flooring outside the shower. Use a wet-area-appropriate, slip-resistant tile, not a material that water damages.
Accessibility reference points
If the shower is for wheelchair use, the U.S. Access Board's guide to ADA bathing rooms describes roll-in showers (a standard type at least 60 inches wide by 30 inches deep) and caps thresholds at half an inch, with a bevel required above a quarter inch (U.S. Access Board: Bathing Rooms). These standards apply to covered facilities, not private homes, but they show what a person using a wheelchair may need. See aging-in-place bathroom design.
Questions to ask before committing
- How will the floor height be solved: recess, raised floor, tray or slab cut?
- What is under the shower area: joists, pipes, ducts, wiring, radiant tubing?
- Will any structural members be cut, notched or replaced, and does that need engineering?
- Which waterproofing system and drain will be used, and how far will waterproofing extend?
- Where are the high and low points of the floor, inside and outside the shower?
- How will the system be tested before tile (for example, a flood test if the system or inspector calls for one)? See shower pan flood test.
- Is this in the permit drawings and the written contract?
Mistakes to avoid
- Simply leaving out the curb on a conventional shower design.
- Stopping waterproofing at the shower edge.
- Notching joists to fit a drain without considering structural limits.
- Choosing slippery floor tile because it matches the walls.
- Pointing the showerhead at the open side.
- Not recording the design in the contract. A California home improvement contract must describe the work and significant materials (BPC § 7159), so name the drain, waterproofing system and floor approach.
Bay Area notes
Housing types vary across the region. Raised-floor houses over crawlspaces may allow work from below, which helps with recessing and drain routing. Slab-on-grade houses, including many Eichlers, may require cutting concrete, and some have radiant heating tubing in the slab that must be located first; see remodeling an Eichler. Upstairs bathrooms over living space raise the stakes of any leak. Condo owners need association approval before altering floor structure. Permit requirements for structural and plumbing changes differ by city; check with your building department.
Checklist
- Height solution chosen and drawn
- Under-floor conditions investigated
- Structural changes reviewed where needed
- Waterproofing extended beyond the shower (manufacturer guidance)
- Drain type matched to slope plan; instructions followed
- Slope directions drawn; nothing slopes toward the door
- Showerhead aimed away from the open side; splash panel considered
- Testing before tile planned
- Permit and contract describe the design
Questions that come up next
Do curbless showers leak onto the bathroom floor?
They can if the floor is not designed for them. A curbless shower needs the shower floor recessed or the bathroom floor raised so slope to the drain starts at or below the room floor, waterproofing that extends beyond the shower, and a drain matched to the slope.
Can I put a curbless shower on a wood-framed floor?
Often, by recessing the subfloor in the shower area. Some manufacturer systems support recessed panels between joists without cutting them; other designs alter joists, which is structural work that may need engineering and must follow code limits on notching and drilling.
How far should waterproofing extend in a curbless shower?
Schluter recommends at least 1 foot beyond the shower area for curbless showers, and some designers waterproof the entire bathroom floor. Follow your waterproofing system's instructions.
Linear drain or center drain for a curbless shower?
A suitably located and sized linear drain can let the floor slope on a single plane, which suits large tiles and simplifies a level entry. A center drain needs slope from all sides. Either can work if the design and installation follow the drain maker's instructions.
Is a curbless shower possible on a concrete slab?
Sometimes, with a designed floor-height solution. Before cutting any slab, have the structure and embedded utilities, reinforcement or post-tensioning assessed. Raising the bathroom floor may be another option, but transitions and accessibility must be checked.
Sources and further reading
Community questions behind this guide
These discussions identify homeowner concerns. Forum comments are personal accounts, not code or legal authority.